My daughter says rice pudding sounds gross, rice & pudding shouldn’t go together. And I agreed with her until I tried this SOB and now it’s one of my favourite desserts.
This makes a creamy pudding. If you like your rice pudding a little thicker use 1/2 c of rice, instead of 1/3 c.
This recipe was printed in our local newspaper over 30 years ago as the winner of a brownie bake-off between Girl Guide troupes. My mom clipped it out and ever since then it has been our family brownie recipe – it really is the best I’ve ever tried, and super quick and easy to make.
This recipe is called ‘Family-Sized’ because it makes enough to feed my family of 6, including 3 teenagers. It’s my Shepherd’s Pie recipe that I’ve made for YEARS. The part that has always given me the biggest headache is the mashed potatoes on top. I’ve been notorious for producing gummy, pasty mashed potatoes without any idea of what I was doing wrong. Well, it turns out it was the potatoes I was using. The consensus on the web is that red and white potatoes, which are ‘waxy’, make the dreaded potato paste, while ‘starchy’ potatoes like Russets or Yukon Golds make fluffy, smooth mashed potatoes. What also helps is drying the potatoes slightly after you have cooked them, but before you mash them. You do this by transferring them back to the pot they were cooked in after they’re drained and place it back on the burner (now turned off) for about a minute to evaporate any remaining moisture.
And one final tip … always season your ground beef after the excess fat has been drained away, otherwise some of that seasoning will flow away with the fat!
Beef Base Ingredients
2 Tbsp olive oil
1 large onion, finely diced
4 cloves garlic, minced
2 lbs lean ground beef
2 c frozen mixed vegetables (corn, peas, carrots, beans)
3/4 tsp salt
1/4 tsp pepper
1/2 c flour
2 – 3 c part-skim (2%) milk
Mashed Potato Ingredients:
10-12 small to medium Yukon Gold or Russet potatoes
1/2 c part-skim (2%) milk
1/4 c butter
3/4 tsp salt
Directions:
Peel potatoes and cut so they are all about the same size. Boil them until tender.
Preheat oven to 375 degrees.
Meanwhile, heat olive oil in a large fry pan. Cook the onions and garlic for 1-2 minutes, then add the ground beef.
Brown the ground beef, then drain as best as possible but it’s ok to have a little of the fat still in there, it will help form the gravy.
Add in the frozen vegetables and the first amount of salt and pepper.
Sprinkle the meat mixture with the flour and stir slightly.
Add the first amount of milk, starting with just 2 cups, and continue cooking for 3-4 minutes until a gravy forms. If it appears dry, add more milk.
Once the potatoes are cooked, drain them then add the second amount of milk, butter and second amount of salt, then mash with a potato masher or a hand-blender.
Place the meat mixture in the bottom of a greased 9 x 13 inch baking dish. Spread the mashed potatoes on top.
Optional: you can now make it fancy by making designs on the top with a fork and sprinkling with a little bit of paprika.
Cover with aluminum foil and bake in the oven for 45 minutes, removing the foil for the last 10 minutes of cooking.
Allow to stand 10 minutes before serving.
Nutritional Information*
Servings: 10
Calories: 400
Total Fat: 15.2 g
Saturated Fat: 7.7 g
Total Carbohydrates: 35.1 g
Dietary Fiber: 2.9 g
Sugar: 5.8 g
Protein: 24.8 g
*Nutritional Information estimated using MyFitnessPal
I cook this quiche without a crust to make it low-carb / keto but you can always place it in a pre-made crust for the traditional quiche way.
Ingredients:
1 Tbsp olive oil
1/2 onion, chopped
1 (10 oz) package frozen, chopped spinach, thawed and drained (squeeze well to get all the moisture out)
Juice from one lime
5 eggs, beaten
2 c shredded mozzarella
1/4 tsp salt
1/8 tsp black pepper
Directions:
Preheat oven to 350 degrees. Spray a 9-inch pie pan with olive oil cooking spray.
Heat oil over medium heat in a frying pan. Add onions and cook until soft & translucent (not browned). Squeeze the juice of the lime into the onions. Transfer to a plate and place in the fridge to cool slightly.
Whisk eggs with salt & pepper in a large mixing bowl. Stir in cheese & spinach & onions from the fridge.
Transfer to the pie pan and cook for 30 minutes or until set.
Nutritional Information*
Servings: 4
Calories: 303
Total Fat: 22.1 g
Saturated Fat: 9.4 g
Total Carbohydrates: 6.7 g
Dietary Fiber: 1.9 g
Sugar: 0.5 g
Protein: 24.1 g
*Nutritional Information estimated using MyFitnessPal
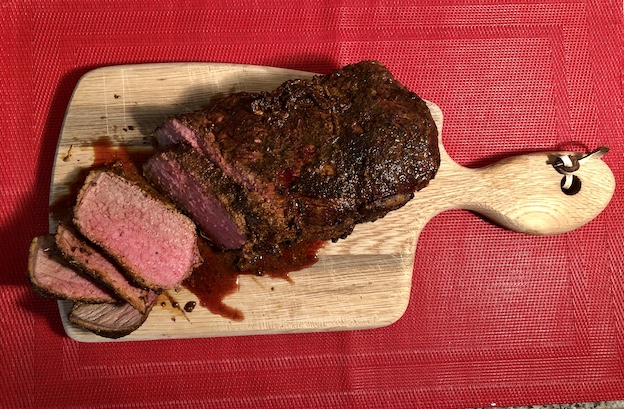
I went through many failed oven roast attempts before finally getting it right. They always turned out dry or tasteless. With this recipe my family is finally enjoying roast again.
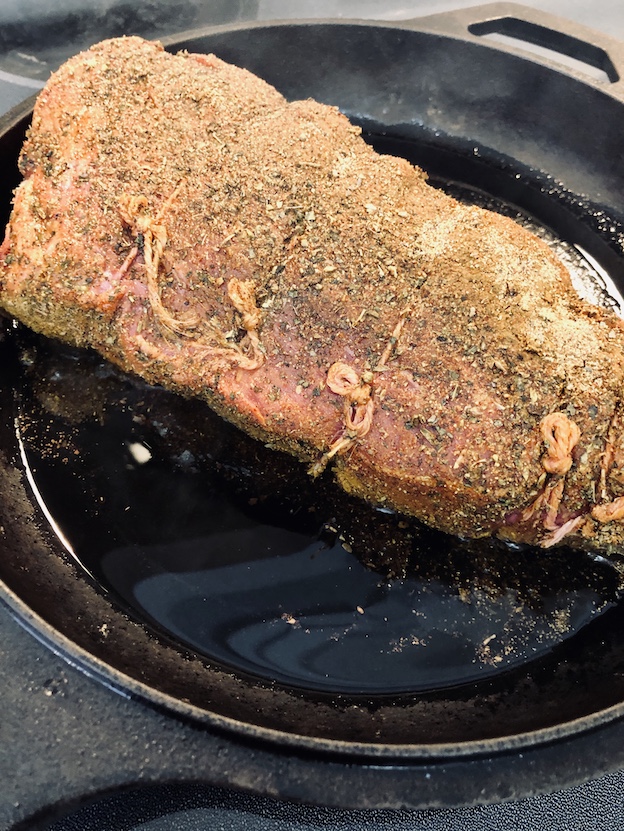
There is a key point to browning any sort of meat that should be mentioned. It’s important that the meat is dry and the oil is hot in the pan. If the meat isn’t dry it will essentially boil in its own juices and turn grey, not brown, so make sure you pat it off with some paper towel first. And, if the oil in the pan is not hot you don’t get that hard layer form on the outside of the meat that seals in all the juices, instead they leak out as the pan heats up.
Salting the meat the day before is also a nice touch because it soaks in and makes for a really flavourful roast throughout.
To have the meat turn out perfect the best way is to use a meat thermometer, available at your local grocery store or on Amazon for cheap. It will ensure it’s not over-cooked or under-cooked. Here’s a handy chart for meat done-ness.
One final note: If you don’t have a cast-iron pan you can still brown the meat in a frying pan then transfer to a roasting pan with a rack in the bottom.
Ingredients:
1 (4-5 lb / 2 kg) oven roast
1 tsp black pepper
1 tsp dried oregano
1 tsp dried basil
1 tsp turmeric
1 tsp chili powder
1 tsp garlic powder
1 tsp onion powder
2 tsp salt
olive oil
Directions:
Optional: Salt the meat and then wrap in plastic wrap and store in the refrigerator overnight.
Preheat oven to 250 degrees.
Pat the meat dry using paper towels.
Combine in a small bowl: black pepper, dried oregano, dried basil, turmeric, chili powder, garlic powder, onion powder and salt.
Rub the meat with olive oil, then with the spice mixture.
Coat the bottom of a cast-iron pan with oil and set over medium-high heat. Once the oil is hot, place the meat in the pan, browning on all sides.
Move the pan to the oven, do not cover.
Cook until the meat reaches an internal temperature of 115 degrees F, approximately 1 hour and 20 minutes.
Turn the oven off and leave the roast in the oven until is reaches 140 degrees F, approximately 40 minutes. This will bring the roast to Medium doneness. Cook it to 130 degrees F, if you like your meat medium-rare.
Remove the pan from the oven, place the roast on a cutting board, and cover with aluminum foil then allow it to rest for about 15 minutes before carving.
Nutritional Information*
Servings: 6 (2 lb/1 kg roast)
Calories: 241
Total Fat: 9.2 g
Saturated Fat: 2.6 g
Total Carbohydrates: 0 g
Dietary Fiber: 0 g
Sugar: 0 g
Protein: 36.7 g
*Nutritional Information estimated using MyFitnessPal
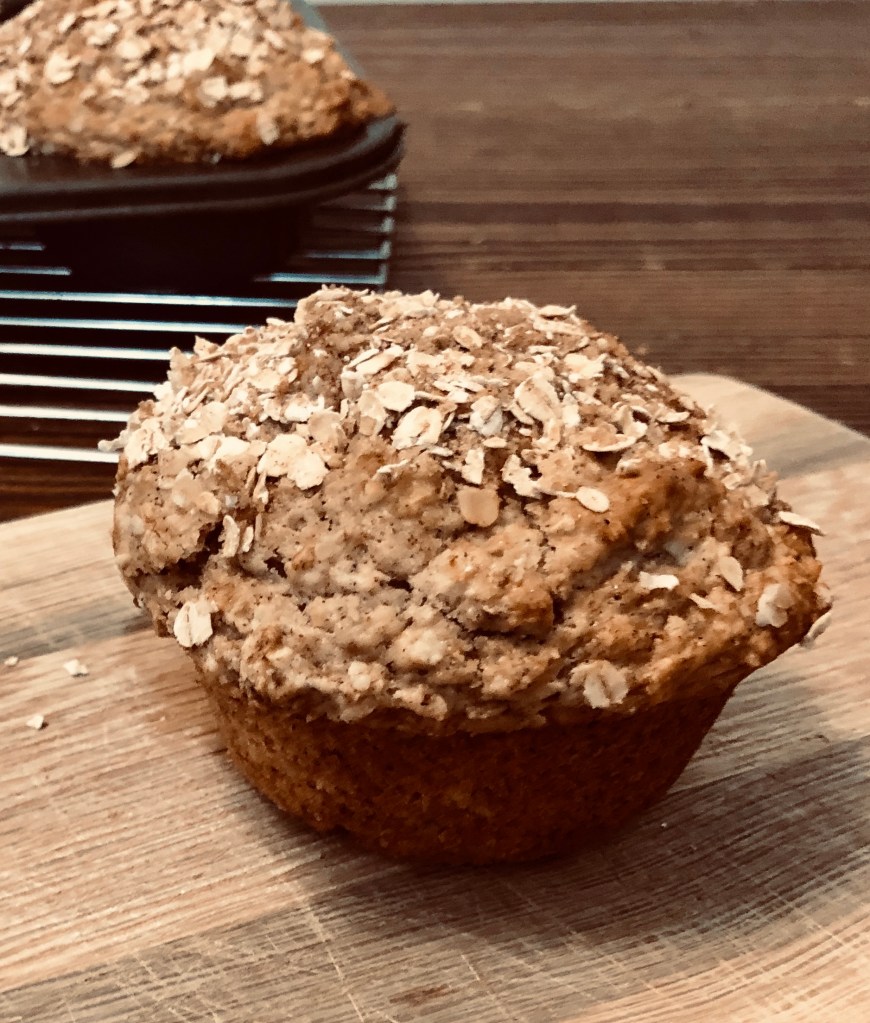
Buttermilk and sour cream are two ingredients you can add to any baking recipe and it will just kick it up a notch. If you don’t have buttermilk you can replace it with milk ‘soured’ by adding 1 Tbsp of lemon juice or white vinegar to it. You can also use large flake oats in this recipe instead of quick-cooking, but then I can’t guarantee they will be ‘bakery-style’.
As with any baking there’s a few ways to tell when the muffins are done, since every oven is slightly different. The centre of a muffin should look dry, not wet and it shouldn’t giggle when shaken slightly. If you lightly poke the centre with your finger, it should bounce back, not stay indented. The edges of a muffin should be slightly brown and pulled away from the sides of the pan (this won’t work if you’re using paper muffin cup liners). And finally, you can poke a toothpick or a small knife into the very centre of a muffin and if it comes out without any batter stuck to it, they’re done!
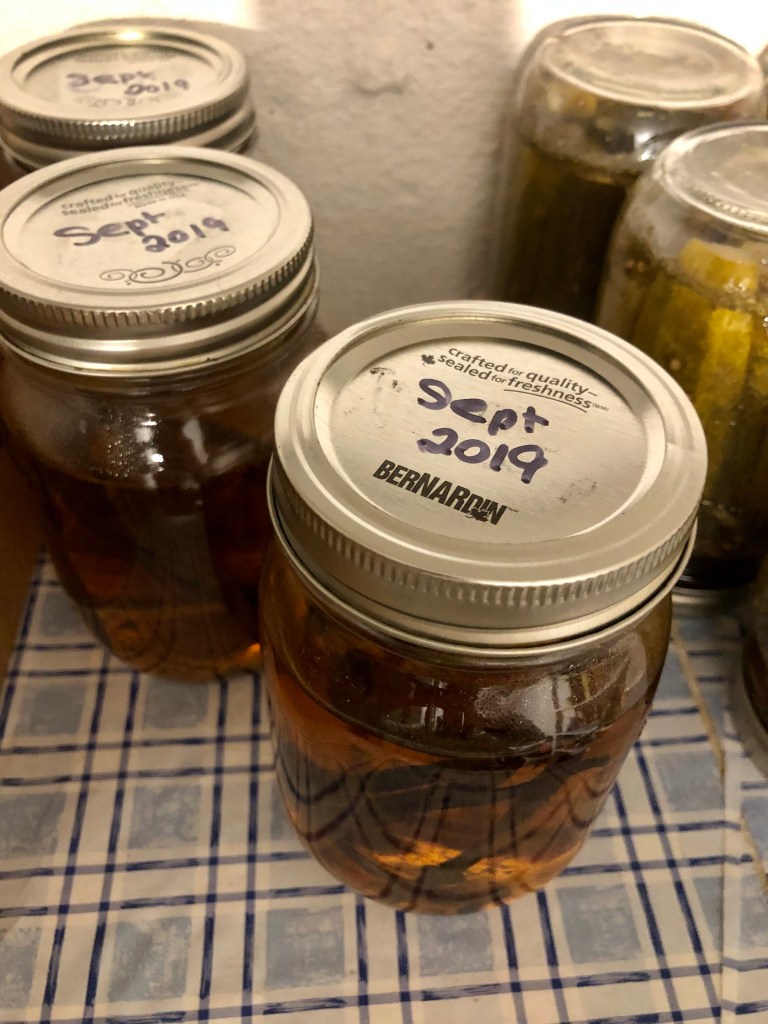
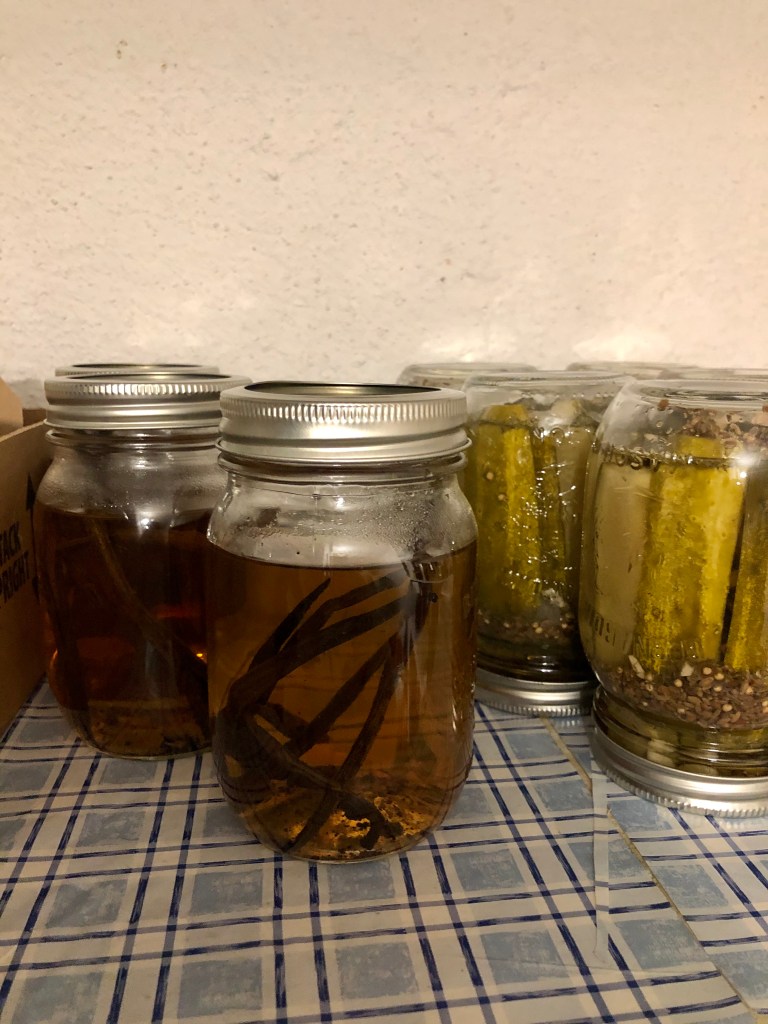
Really good vanilla extract can make a world of difference to all your baked goods, it just adds a surprising richness and decadence. The thing is … you need to make it at least 4 to 6 months ahead of when you plan on using it … so if you want to have some nice Christmas gifts to give away, start in June. Once I get down to my last mason jar, which typically lasts about 6 months, I make my next batch.
The other thing that really makes this vanilla extract wonderful is increasing its strength by placing the beans from a recently-finished mason jar into the next jar you open. Keep doing that, keep recycling the old beans into the next jar and several jars later you really get a rich, full flavour.
6 fresh vanilla beans ( I get mine from Bulk Barn usually in glass containers that look like they’re from science class and are up near the cash register)
3 mason jars
Directions:
Take 2 vanilla beans and slice in half the long way. Use the side of your knife to scrape out the insides of the beans.
Place the beans and the insides into a mason jar.
Fill with rum.
Repeat for the other 2 mason jars.
Mark with the date and store in a cool, dry place. Once a month give the jars a shake.
I searched and searched for the perfect chocolate chip cookie recipe and after many years I finally found it … that’s why they are the ‘best ever, award winning, ultimate’ chocolate chip cookies. This has been my go-to recipe ever since.
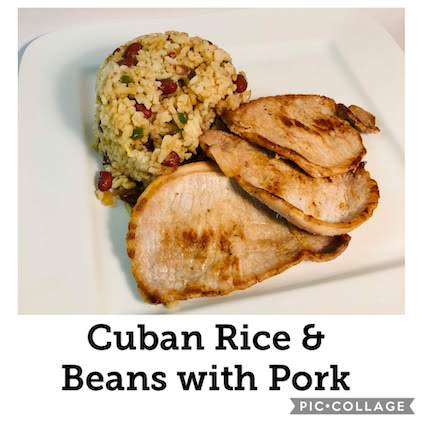
My husband and I got home from Cuba at 4:00 am this morning and when I finally woke up the first thing I wanted to do was make the amazing rice and beans with pork cutlets that I ate there … and my husband actually said it was the best cuban food he’s eaten all week!
Ingredients:
2 c white rice
4 c water
1/4 c olive oil, divided
3 cloves garlic, finely diced
1/2 sweet onion, finely diced
1/2 green pepper, finely diced
2 tsp cumin
1 1/2 tsp salt + 1 tsp salt
1 can beans (kidney or black) (approx. 2 1/2 c)
Juice from 1 lime
1 lb ‘fast fry’ pork tenderloin cutlets
Directions:
Season the pork cutlets well with salt & pepper. Set aside.
Heat 2 tsp olive oil in a medium pot. Fry the garlic for 1-2 minutes.
Add the rice and the 1 1/2 tsp salt, cook for 1-2 minutes.
Add the water and bring to a boil.
Turn down to a low simmer, cover and cook for 20 minutes.
Once the rice is done allow it to cool (or place in a bowl in the fridge to cool quickly).
Heat some olive oil in a frying pan. Fry the pork cutlets until nicely browned on both sides, adding more oil as needed. Place in a covered dish to keep warm.
Once all the pork is fried, add more oil to the pan and cook the onion and green peppers for 1- 2 minutes.
Add the beans, cumin and the 1 tsp salt, cook for 1-2 minutes.
Add the cooled rice and lime juice. Stir until well combined.
Serve rice & beans with pork cutlets and salad on the side.
Nutritional Information*
Servings: 4
Calories: 516
Total Fat: 4 g
Saturated Fat: 1.1 g
Total Carbohydrates: 83.6 g
Dietary Fiber: 7.1 g
Sugar: 2.2 g
Protein: 34.2 g
*Nutritional Information estimated using MyFitnessPal